Introduction
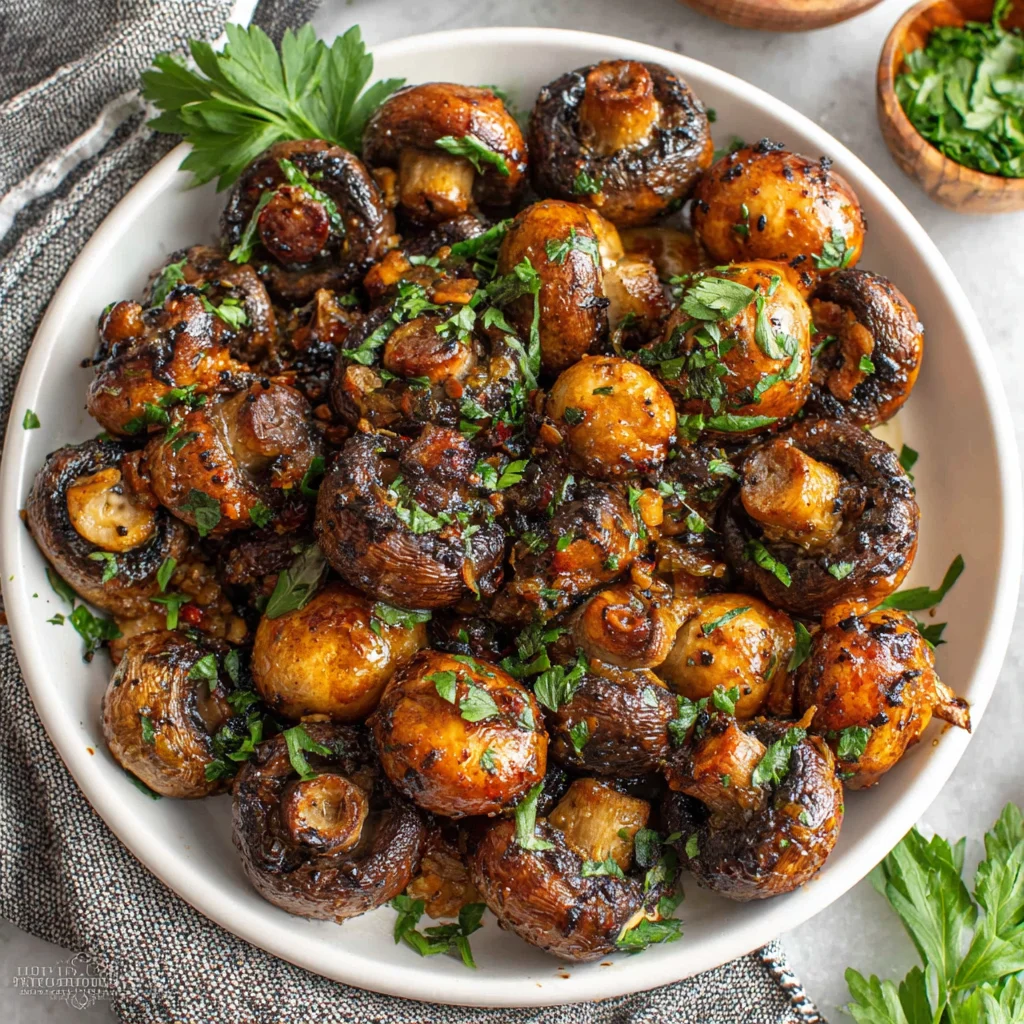
Picture the most incredible aroma filling your kitchen – earthy mushrooms mingling with sweet, caramelized garlic, all wrapped in a warm embrace of herbs and butter. That’s exactly what happens when you make these Roasted Garlic Mushrooms, a side dish so irresistible it might just steal the spotlight from your main course. I first discovered this simple yet elegant preparation during a cozy dinner party at my friend’s rustic farmhouse, where she served these golden, glistening beauties alongside herb-crusted chicken. The way the mushrooms had absorbed all those beautiful flavors while developing perfectly caramelized edges made them absolutely unforgettable.
What makes this dish truly special is its remarkable versatility – whether you’re planning an intimate dinner for two or hosting a holiday feast, these roasted garlic mushrooms complement virtually any meal. The magic lies in the slow roasting process, which transforms humble button mushrooms into something extraordinary, concentrating their natural umami while the garlic becomes sweet and nutty. Best of all, this foolproof recipe requires minimal prep time and practically cooks itself in the oven.
Ingredients List
Creating these magnificent roasted garlic mushrooms requires just a handful of quality ingredients that work together in perfect harmony:
Base Ingredients:
- 1.5 pounds mixed mushrooms (button, baby bella, or cremini), cleaned and halved
- 6-8 garlic cloves, minced (don’t be shy with the garlic!)
- 3 tablespoons olive oil
- 2 tablespoons butter, melted
Seasonings:
- 1 teaspoon fresh thyme leaves (or ½ teaspoon dried)
- ½ teaspoon salt, or to taste
- ¼ teaspoon black pepper, freshly ground
- ¼ teaspoon smoked paprika (optional, but adds wonderful depth)
Finishing Touches:
- 2 tablespoons fresh parsley, chopped
- 1 tablespoon lemon juice (brightens the entire dish)
Smart Substitutions: For those avoiding dairy, simply replace the butter with additional olive oil or vegan butter. If you’re following a low-sodium diet, reduce the salt and let the natural mushroom flavors shine through. Fresh herbs can be swapped for dried at a 3:1 ratio, and feel free to experiment with rosemary or oregano for different flavor profiles.
Timing
This delightfully simple dish comes together with minimal effort and maximum flavor:
Preparation Time: 10 minutes
Cooking Time: 25-30 minutes
Total Time: 35-40 minutes
The beauty of this dish lies in its hands-off cooking approach. While the mushrooms roast to perfection, you’ll have plenty of time to prepare your main course or set the table. For optimal time management, start these mushrooms about 30 minutes before you want to serve dinner.
Make-Ahead Magic: You can prep the mushrooms and garlic mixture up to 4 hours in advance – simply cover and refrigerate until ready to roast. This actually allows the flavors to meld beautifully, resulting in an even more delicious final dish.
How to Make It
1. Prepare Your Kitchen Canvas
Preheat your oven to 425°F (220°C) and position the rack in the center. Line a large rimmed baking sheet with parchment paper – this prevents sticking and makes cleanup effortless. The high heat is crucial for achieving those gorgeous caramelized edges that make this dish so irresistible.
2. Prep the Star Ingredients
Clean your mushrooms with a damp paper towel (avoid washing them, as they’ll absorb water and become soggy). Trim any tough stems and cut larger mushrooms in half, keeping smaller ones whole for even cooking. Mince your garlic finely – the smaller pieces will distribute more evenly and caramelize beautifully without burning.
3. Create the Flavor Base
In a large mixing bowl, whisk together the olive oil, melted butter, minced garlic, thyme, salt, pepper, and smoked paprika. This aromatic mixture will coat every mushroom surface, ensuring maximum flavor in every bite. The combination of oil and butter provides the perfect balance of richness and high-heat cooking capability.
4. Coat and Arrange
Add the prepared mushrooms to your flavor mixture and toss thoroughly, ensuring each piece is completely coated. Spread them in a single layer on your prepared baking sheet, cut-side down when possible. This positioning allows the mushrooms to develop those coveted golden-brown surfaces while releasing their natural juices.
5. Roast to Perfection
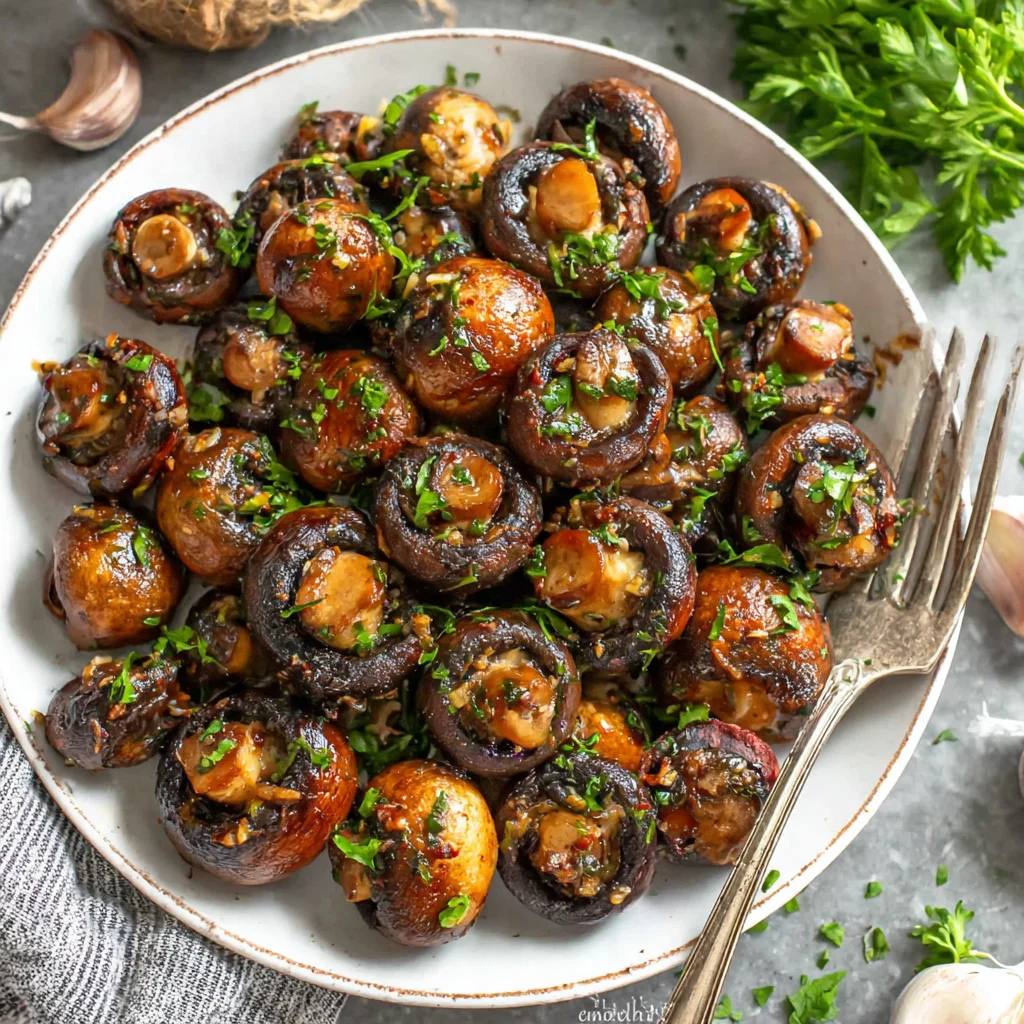
Slide the baking sheet into your preheated oven and roast for 20-25 minutes. You’ll know they’re ready when the edges are golden brown and the mushrooms have reduced in size, concentrating their flavors. The kitchen will smell absolutely divine – that’s your cue that something magical is happening.
6. Add the Finishing Touches
Remove from the oven and immediately sprinkle with fresh parsley and a squeeze of bright lemon juice. These final additions add color, freshness, and a subtle brightness that perfectly balances the rich, earthy flavors. Serve immediately while they’re still sizzling hot.
Nutritional Information
These roasted garlic mushrooms offer impressive nutritional value alongside their incredible taste. Each serving provides a good source of selenium, potassium, and B vitamins, particularly riboflavin and niacin. Mushrooms are naturally low in calories and fat while being rich in antioxidants that support immune function.
The garlic contributes beneficial compounds that support heart health, while the olive oil provides healthy monounsaturated fats. Fresh herbs like thyme add vitamin C and various beneficial plant compounds. This dish fits well into Mediterranean-style eating patterns and can easily accommodate various dietary preferences.
Approximate per serving (serves 6): 95 calories, 8g fat, 5g carbohydrates, 2g fiber, 3g protein. Nutritional values may vary based on specific ingredients and portion sizes used.
Healthier Alternatives for the Recipe
Transform this already nutritious dish to meet various dietary needs without sacrificing flavor:
Lower Calorie Version: Reduce the oil to 2 tablespoons and skip the butter, using cooking spray on the pan instead. The mushrooms will still caramelize beautifully, and you’ll save approximately 40 calories per serving while maintaining the essential flavors.
Heart-Healthy Adaptation: Use exclusively olive oil instead of butter and add extra herbs for flavor complexity. Consider incorporating heart-healthy seasonings like oregano or rosemary, which provide additional antioxidants.
Sodium-Conscious Option: Reduce salt to ¼ teaspoon and boost flavor with additional garlic, lemon zest, and fresh herbs. The natural umami in mushrooms provides plenty of savory satisfaction without relying heavily on salt.
Oil-Free Version: For those avoiding oils entirely, roast the mushrooms with just vegetable broth (about 3 tablespoons), garlic, and seasonings. The results will be slightly different in texture but equally delicious and significantly lower in calories.
Serving Suggestions
These versatile roasted garlic mushrooms complement countless main dishes and presentation styles:
Perfect Pairings: Serve alongside grilled steak, roasted chicken, or baked salmon for an elegant dinner. They’re equally delicious with vegetarian mains like stuffed portobello caps or quinoa-stuffed bell peppers. The earthy flavors also pair beautifully with creamy polenta or garlic mashed potatoes.
Presentation Ideas: Arrange on a rustic wooden platter garnished with additional fresh herbs, or serve family-style directly from a cast-iron skillet for casual dining. For special occasions, plate individually as an elegant side portion alongside your featured protein.
Seasonal Variations: In fall, add a splash of balsamic vinegar and toasted pine nuts. During spring, incorporate fresh asparagus pieces in the last 10 minutes of roasting. Winter calls for heartier herbs like rosemary and sage.
Portion Guidance: Plan for about ¾ cup per person as a side dish, though you might want to make extra – these tend to disappear quickly!
Common Mistakes to Avoid
Navigate potential pitfalls with these tried-and-true solutions:
Overcrowding the Pan: Mushrooms need space to caramelize properly. If they’re too close together, they’ll steam instead of roast, resulting in a soggy texture. Use two baking sheets if necessary, or roast in batches.
Using Wet Mushrooms: Washing mushrooms adds excess moisture that prevents proper browning. Instead, clean them with a damp paper towel or soft brush. If you must rinse them, pat completely dry before proceeding.
Burning the Garlic: Minced garlic can burn quickly at high temperatures. If your garlic pieces are turning dark brown within the first 10 minutes, lower the oven temperature to 400°F and continue cooking. Mixing the garlic with oil helps protect it from burning.
Under-seasoning: Mushrooms can handle generous seasoning due to their mild flavor. Don’t be afraid to taste and adjust salt and pepper levels before roasting. Remember, you can always add more after cooking, but you can’t take it away.
Skipping the Lemon: That final squeeze of lemon juice isn’t optional – it brightens all the rich, earthy flavors and prevents the dish from tasting flat or one-dimensional.
Storing Tips for the Recipe
Maximize your delicious investment with proper storage techniques:
Refrigerator Storage: Store leftover roasted garlic mushrooms in an airtight container for up to 4 days in the refrigerator. The flavors actually deepen over time, making leftovers particularly delicious. Let them cool completely before refrigerating to prevent condensation.
Reheating Methods: Reheat gently in a 350°F oven for 8-10 minutes to restore some of the original texture. Alternatively, warm them in a skillet over medium heat for 3-4 minutes, stirring occasionally. Avoid microwaving, which can make them rubbery.
Make-Ahead Strategy: Prepare the entire dish up to the point of roasting, then cover and refrigerate for up to 24 hours. Add an extra 5 minutes to the cooking time if roasting directly from cold. This advance preparation actually enhances flavor development.
Freezing Notes: While possible, freezing isn’t recommended as it significantly changes the mushroom texture. If you must freeze, use them in soups or stews rather than as a standalone side dish.
Conclusion
These roasted garlic mushrooms represent everything wonderful about simple, ingredient-driven cooking – minimal effort yielding maximum flavor reward. The transformation that occurs in your oven is nothing short of magical, turning everyday ingredients into something that feels special enough for company yet easy enough for weeknight dinners. The combination of caramelized edges, tender centers, and that irresistible garlic aroma creates a side dish that consistently earns rave reviews.
What I love most about this dish is its forgiving nature and endless adaptability. Whether you’re a novice cook building confidence or an experienced chef seeking reliable results, these mushrooms deliver every single time. The technique translates beautifully to different mushroom varieties and seasoning combinations, making it a valuable addition to your cooking repertoire.
Don’t hesitate to make this your own – adjust the herbs, experiment with different mushroom types, or add your favorite seasonings. I’d love to hear about your variations and successes with this recipe, so please share your experiences and creative adaptations!
FAQs
Can I use different types of mushrooms for this recipe?
Absolutely! While button and cremini mushrooms work beautifully, feel free to experiment with shiitake, oyster, or portobello mushrooms. Just adjust cooking times slightly – denser mushrooms like portobellos may need an extra 5-10 minutes, while delicate varieties like oyster mushrooms might cook faster.
How do I know when the mushrooms are perfectly done?
Look for golden-brown edges and slightly shrunken mushrooms that have released some of their juices. They should be tender when pierced with a fork but still hold their shape. The garlic should be fragrant and lightly golden, not dark brown.
Can I prepare these mushrooms without oil or butter?
Yes, though the texture will be different. Use vegetable broth or mushroom stock to prevent sticking, and increase the herbs and seasonings for flavor. The mushrooms won’t caramelize as deeply but will still be delicious and much lower in calories.
What’s the best way to clean mushrooms without making them soggy?
Use a damp paper towel or soft brush to gently wipe away any dirt. If they’re particularly dirty, give them a quick rinse and immediately pat dry with paper towels. Never soak mushrooms in water as they absorb moisture like sponges.
Can I double this recipe for a larger crowd?
Certainly! Use two large baking sheets to ensure the mushrooms aren’t overcrowded. You may need to rotate the pans halfway through cooking for even browning. All other timing and temperatures remain the same.
Why do my roasted mushrooms turn out soggy instead of caramelized?
This usually happens when mushrooms are overcrowded on the pan or too wet before cooking. Ensure mushrooms are properly dried and spread in a single layer with space between pieces. Also, resist the urge to stir them during cooking – let them develop those beautiful caramelized surfaces undisturbed.