Introduction
There’s something absolutely magical that happens when butter meets heat and transforms into liquid gold. Brown butter chocolate chip cookies represent the perfect marriage of nutty, caramelized butter and rich chocolate chunks, creating a cookie experience that transcends the ordinary. The moment you taste these golden beauties, you’ll understand why brown butter has become the secret weapon of pastry chefs everywhere.
What sets these cookies apart isn’t just their incredible flavor—it’s the way the brown butter adds depth and complexity that makes each bite more interesting than the last. The nutty, almost toffee-like notes from the browned butter complement the sweetness of chocolate chips while creating a chewy texture that’s simply irresistible. This elevated twist on the classic chocolate chip cookie has become my go-to recipe whenever I want to impress guests or treat myself to something extraordinary. Trust me, once you master the art of browning butter, you’ll never want to go back to regular cookies again.
Ingredients List
Base Ingredients:
- 1 cup (2 sticks) unsalted butter
- 1 cup brown sugar, packed
- ½ cup granulated sugar
- 2 large eggs, room temperature
- 2 teaspoons pure vanilla extract
- 2¼ cups all-purpose flour
- 1 teaspoon baking soda
- 1 teaspoon fine sea salt
Chocolate Components:
- 1½ cups dark chocolate chips or chunks
- ½ cup semi-sweet chocolate chips (optional, for variety)
Finishing Touch:
- Flaky sea salt for sprinkling (optional but highly recommended)
Smart Substitutions:
For gluten-free needs, swap all-purpose flour with a 1:1 gluten-free baking blend. Those avoiding refined sugar can use coconut sugar in place of granulated sugar, though the texture will be slightly different. Vegan butter works beautifully for browning and creates equally delicious results. If you’re out of brown sugar, mix granulated sugar with molasses (1 tablespoon per cup of sugar).
Timing
Time Breakdown:
- Prep time: 15 minutes
- Brown butter cooling: 10 minutes
- Chilling time: 30 minutes (optional but recommended)
- Baking time: 10-12 minutes per batch
- Total time: Approximately 1 hour 15 minutes
Time Management Tips:
While the brown butter cools, measure out your dry ingredients and prepare your baking sheets. This efficient approach keeps you moving smoothly through the process. The dough can be made up to 2 days ahead and stored in the refrigerator, making these perfect for planned entertaining. If you’re short on time, skip the chilling step—the cookies will still be delicious, just slightly more spread out.
How to Make It
1. Brown the Butter to Perfection
Place butter in a light-colored saucepan over medium heat. The light color helps you monitor the browning process. Stir constantly as the butter melts, foams, and eventually turns golden amber with a nutty aroma. You’ll hear crackling sounds as the water evaporates—this is exactly what you want. The whole process takes about 5-7 minutes. Once you see golden brown bits at the bottom and smell that incredible nutty fragrance, remove from heat immediately and pour into a bowl, including all those precious browned bits.
2. Create the Cookie Base
Allow the brown butter to cool for about 10 minutes—it should be warm but not hot. Whisk in both brown and granulated sugars until well combined. The mixture will look slightly grainy, which is perfectly normal. Add eggs one at a time, beating well after each addition, then stir in vanilla extract. This creates the foundation for perfectly chewy cookies.
3. Combine Dry Ingredients
In a separate bowl, whisk together flour, baking soda, and salt. This ensures even distribution of leavening agents throughout your cookies. Gradually fold the flour mixture into the butter mixture using a wooden spoon or rubber spatula. Mix just until combined—overmixing leads to tough cookies.
4. Fold in the Chocolate
Gently fold in chocolate chips, distributing them evenly throughout the dough. This is where the magic happens—each bite will have the perfect balance of cookie dough and chocolate. For extra indulgence, reserve a few chocolate chips to press on top of each cookie before baking.
5. Shape and Chill
Using a cookie scoop or spoons, portion dough into balls about 2 tablespoons each. Place on a parchment-lined baking sheet and refrigerate for 30 minutes. This chilling step helps prevent excessive spreading and creates a better texture. While chilling isn’t absolutely necessary, it’s worth the wait for superior results.
6. Bake to Golden Perfection
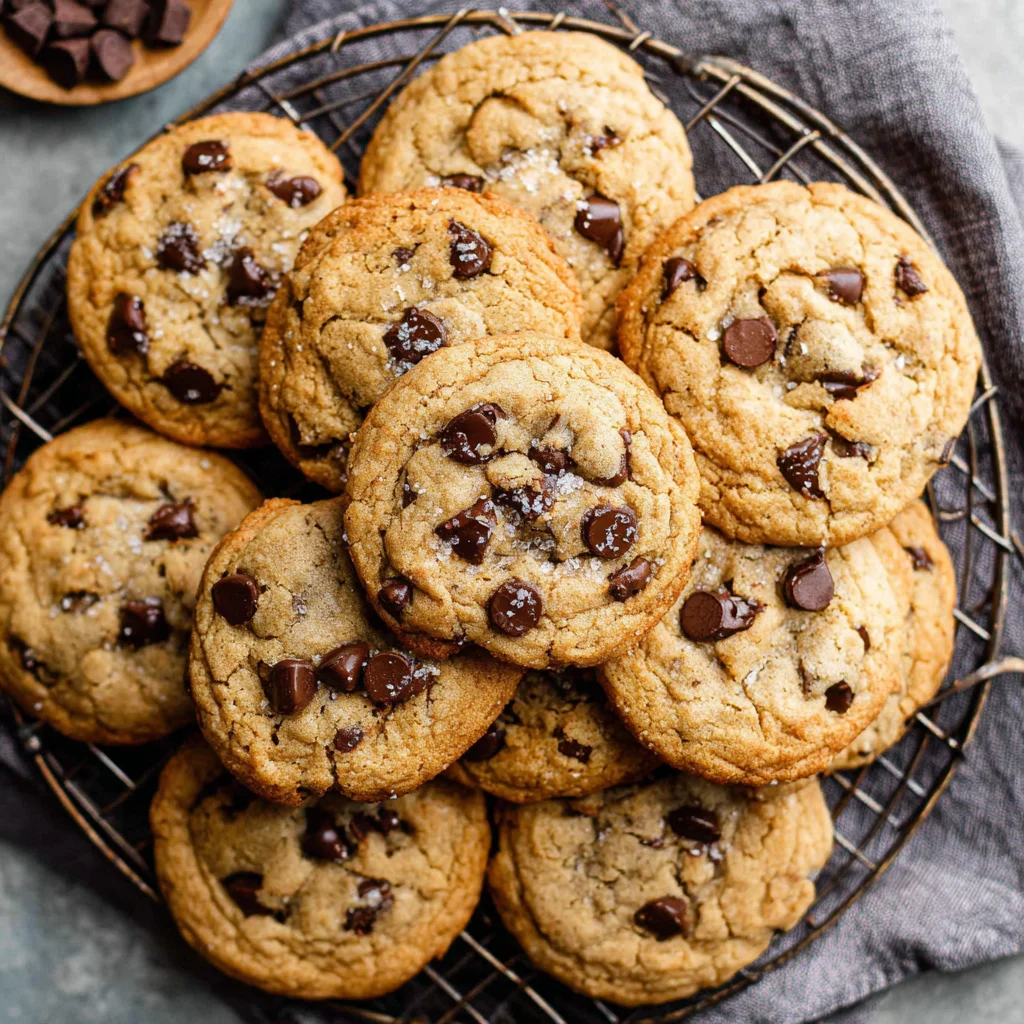
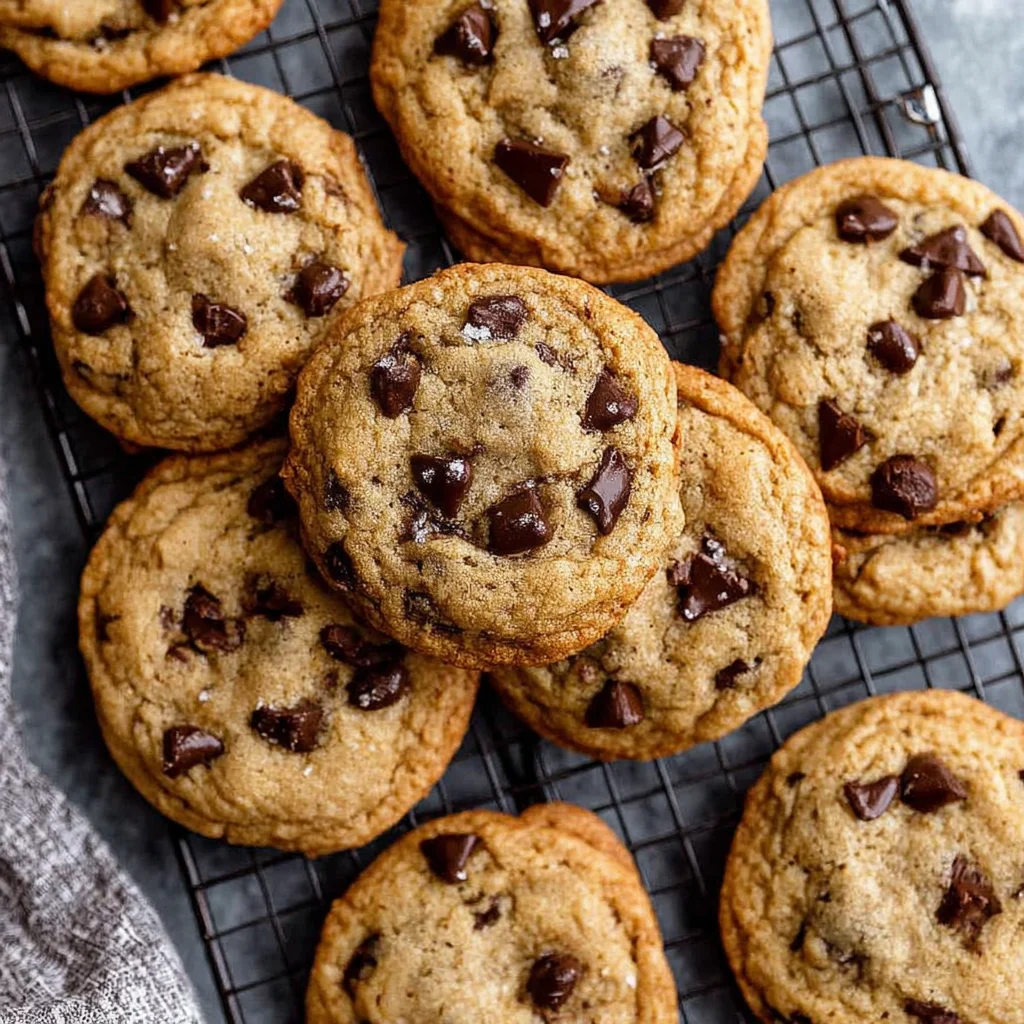
Preheat oven to 350°F (175°C). Place chilled cookie dough balls on parchment-lined baking sheets, spacing them about 2 inches apart. Bake for 10-12 minutes, until edges are set and golden brown but centers still look slightly underbaked. They’ll continue cooking on the hot pan after removal. Sprinkle with flaky sea salt while still warm for an extra flavor dimension.
Nutritional Information
Each brown butter chocolate chip cookie (makes approximately 36 cookies) contains roughly:
- Calories: 165
- Total Fat: 8g
- Saturated Fat: 5g
- Cholesterol: 25mg
- Sodium: 85mg
- Total Carbohydrates: 23g
- Dietary Fiber: 1g
- Sugars: 15g
- Protein: 2g
These cookies provide quick energy from carbohydrates and contain small amounts of iron from the flour and antioxidants from dark chocolate. The brown butter adds a rich source of fat-soluble vitamins, while eggs contribute protein and essential amino acids. Keep in mind that nutritional values may vary based on specific ingredient brands and portion sizes.
Healthier Alternatives for the Recipe
Reducing Calories:
Replace half the all-purpose flour with almond flour for added protein and reduced carbohydrates. You can also substitute half the chocolate chips with chopped nuts for healthy fats and fewer sugars. Using sugar substitutes like erythritol works well, though the texture will be slightly different.
Gluten-Free Version:
A high-quality 1:1 gluten-free flour blend works seamlessly in this recipe. Add an extra pinch of xanthan gum if your blend doesn’t contain it. The brown butter flavor remains just as spectacular, and most people can’t tell the difference.
Vegan Adaptation:
Plant-based butter browns beautifully and creates the same nutty complexity. Replace eggs with flax eggs (1 tablespoon ground flaxseed mixed with 3 tablespoons water per egg, let sit for 5 minutes). Choose dairy-free chocolate chips to complete the vegan transformation.
Lower Sugar Options:
Reduce granulated sugar by ¼ cup and increase vanilla extract slightly to maintain flavor depth. The cookies will be less sweet but allow the brown butter’s nutty notes to shine even brighter. Adding a touch of cinnamon can enhance perceived sweetness without added sugars.
Serving Suggestions
These brown butter chocolate chip cookies shine on their own, but pairing them thoughtfully elevates the experience. Serve warm with a glass of cold milk for the classic combination that never fails. For adults, try them with coffee or espresso—the nutty brown butter notes complement coffee’s richness beautifully.
Create an elegant dessert by serving cookies alongside vanilla ice cream and fresh berries. The temperature contrast and complementary flavors make for an impressive presentation. During fall months, pair with apple cider or hot chocolate for cozy comfort food vibes.
For special occasions, arrange cookies on a beautiful platter with other baked goods, or package them in decorative boxes as thoughtful gifts. They’re substantial enough to satisfy as an afternoon snack yet refined enough for dinner party dessert.
Common Mistakes to Avoid
Burning the Brown Butter:
The line between perfectly browned and burned butter is thin. Watch carefully and remove from heat as soon as you achieve golden brown color and nutty aroma. Burned butter tastes bitter and ruins the entire batch.
Using Hot Brown Butter:
Adding hot brown butter to sugars can cook the eggs prematurely, creating lumpy dough. Let the butter cool until warm to the touch—patience here ensures smooth, workable dough.
Overbaking:
These cookies continue cooking on the hot pan after removal from the oven. Take them out when centers still look slightly underbaked for perfectly chewy results. Overbaked cookies become dry and lose their appealing texture.
Skipping the Salt:
Salt enhances all the flavors in these cookies and balances the sweetness. Don’t skip it in the dough, and consider that finishing sprinkle of flaky sea salt for extra flavor complexity.
Storing Tips for the Recipe
Room Temperature Storage:
Store cooled cookies in an airtight container at room temperature for up to one week. Layer them between parchment paper to prevent sticking. They’ll maintain their chewy texture and delicious flavor throughout this period.
Freezer Storage:
These cookies freeze exceptionally well for up to three months. Place them in freezer-safe containers or bags, separating layers with parchment paper. Thaw at room temperature for about 15 minutes before serving.
Make-Ahead Dough:
Cookie dough can be portioned into balls and frozen on baking sheets, then transferred to freezer bags once solid. Bake directly from frozen, adding an extra minute or two to baking time. Refrigerated dough keeps for up to three days, actually improving in flavor as ingredients meld together.
Reheating Tips:
Warm cookies briefly in a 300°F oven for 2-3 minutes to restore their just-baked texture. This works especially well for day-old cookies that have lost some softness.
Conclusion
Brown butter chocolate chip cookies represent everything wonderful about home baking—the transformation of simple ingredients into something extraordinary through technique and care. The nutty complexity of brown butter elevates the familiar chocolate chip cookie into gourmet territory, while remaining approachable enough for any home baker to master.
These cookies embody the perfect balance of chewy texture, rich flavor, and comforting familiarity that makes them irresistible to both kids and adults. Whether you’re baking for a special occasion or simply treating yourself to something delicious, this recipe delivers consistent, impressive results every single time.
I encourage you to embrace the brown butter process and make these cookies your own. Experiment with different chocolate varieties, add your favorite mix-ins, or perfect your own finishing salt technique. Don’t forget to share your creations and variations—I’d love to see how you make this recipe uniquely yours.
FAQs
Can I make these cookies without chilling the dough?
Absolutely! While chilling helps prevent excessive spreading and creates a slightly better texture, you can bake the cookies immediately after mixing. They’ll spread a bit more but will still taste incredible.
What if my brown butter solidifies before mixing?
Simply warm it gently in the microwave for 10-15 seconds until it’s soft and mixable again. The brown butter flavor remains intact even after cooling and rewarming.
Can I use different types of chocolate?
Definitely! Try dark chocolate chunks, white chocolate chips, or even butterscotch chips. Each variation creates a unique flavor profile while maintaining the signature brown butter taste.
How do I know when the butter is properly browned?
Look for a golden amber color, nutty aroma, and brown bits at the bottom of the pan. The butter will foam up initially, then settle as water evaporates. The whole process takes about 5-7 minutes over medium heat.
Why are my cookies spreading too much?
This usually happens when the brown butter is too warm when mixed, or the dough is too soft. Chill the dough for 30 minutes, and ensure your brown butter has cooled to room temperature before mixing.
Can I double this recipe?
Yes! This recipe doubles beautifully. Just be extra careful when browning the larger amount of butter, as it may take a few minutes longer and requires constant attention to prevent burning.