Introduction
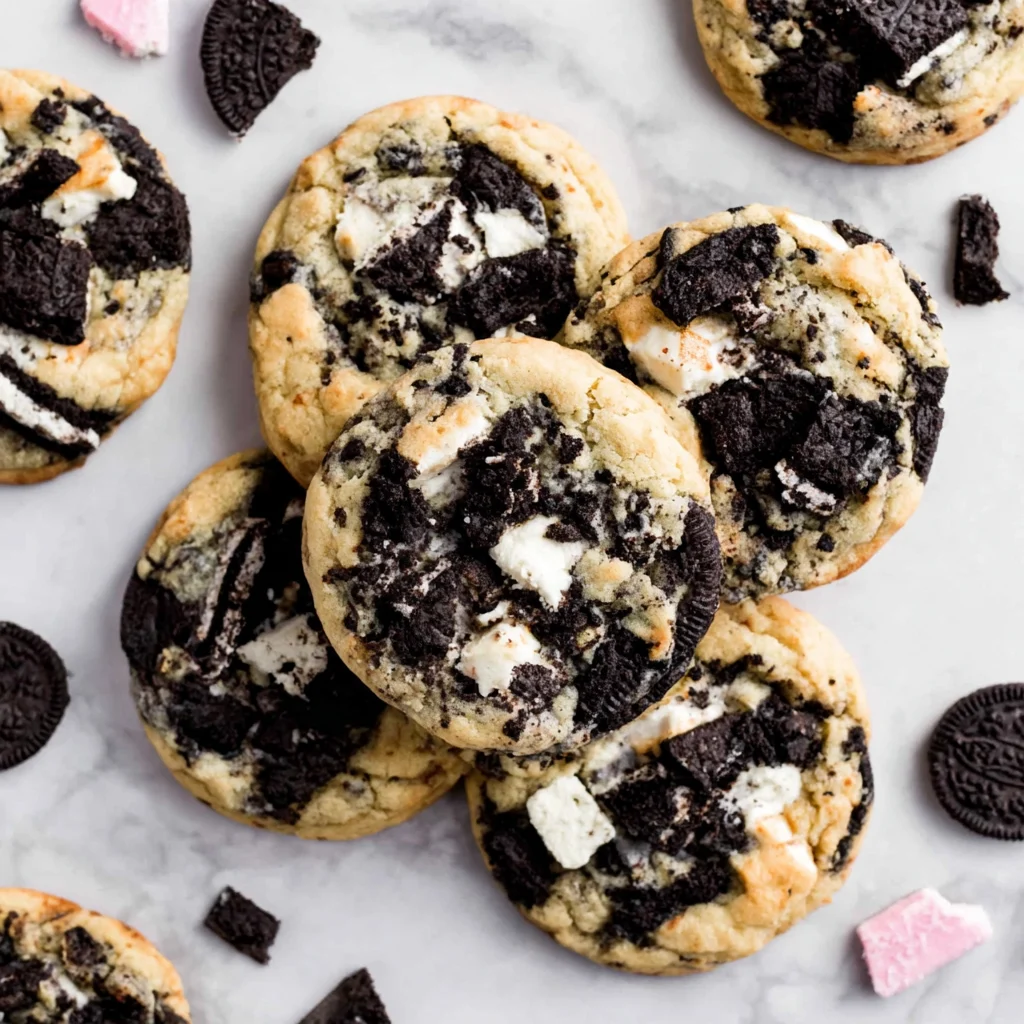
There’s something magical about the combination of crispy chocolate wafers and sweet vanilla cream that transforms ordinary cookies into extraordinary treats. Cookies and cream cookies bring together the beloved flavors of everyone’s favorite sandwich cookie in a soft, chewy homemade version that’s impossible to resist.
These delightful treats capture the nostalgic essence of childhood while delivering the satisfaction of homemade baking. The contrast between the rich chocolate cookie pieces and the tender vanilla-scented dough creates a perfect harmony of textures and flavors. Whether you’re planning a family gathering, need a special dessert for friends, or simply want to treat yourself to something wonderful, these cookies deliver every single time.
What makes this particular version so special is how easily it comes together with simple pantry ingredients, creating bakery-quality results in your own kitchen.
Ingredients List
For the Cookie Dough:
- 2¼ cups all-purpose flour
- 1 cup (2 sticks) unsalted butter, softened
- ¾ cup granulated sugar
- ¾ cup packed light brown sugar
- 2 large eggs, room temperature
- 2 teaspoons vanilla extract
- 1 teaspoon baking soda
- 1 teaspoon salt
For the Cookies and Cream Mix-ins:
- 20 chocolate sandwich cookies, roughly chopped
- ½ cup white chocolate chips (optional)
- 2 tablespoons heavy cream
Substitution Suggestions:
- Gluten-free option: Replace all-purpose flour with a 1:1 gluten-free baking flour blend
- Dairy-free alternative: Use vegan butter and plant-based cream
- Reduced sugar: Substitute ⅓ of the sugar with sugar substitute suitable for baking
- Egg-free version: Replace each egg with 1 tablespoon ground flaxseed mixed with 3 tablespoons water
The beauty of these ingredients lies in their simplicity – most are likely already waiting in your pantry, making this an ideal last-minute baking project.
Timing
Total Time: 45 minutes
Preparation Time: 20 minutes
Baking Time: 10-12 minutes per batch
Cooling Time: 15 minutes
Time Management Tips:
Start by bringing your eggs and butter to room temperature about 30 minutes before baking – this ensures better mixing and texture. While your first batch bakes, prepare the second batch on parchment paper for seamless transitions.
Make-Ahead Opportunities:
The cookie dough can be prepared up to 2 days in advance and stored covered in the refrigerator. You can also portion the dough into balls and freeze them for up to 3 months. Bake directly from frozen, adding 1-2 extra minutes to the baking time.
Multi-tasking Suggestions:
While the butter softens, chop your sandwich cookies and measure out your dry ingredients. This efficient approach keeps you moving smoothly through the process without any waiting periods.
How to Make It
1. Prepare Your Workspace
Preheat your oven to 375°F (190°C) and line two large baking sheets with parchment paper. This prevents sticking and ensures even browning. Position your oven racks in the upper and lower thirds for optimal heat circulation.
2. Mix the Dry Ingredients
In a medium bowl, whisk together flour, baking soda, and salt until well combined. This step ensures even distribution of the leavening agents throughout your dough, preventing uneven rising or salty pockets.
3. Cream Butter and Sugars
In a large mixing bowl, beat the softened butter with both sugars using an electric mixer on medium speed for 3-4 minutes. The mixture should become light, fluffy, and pale in color. This creaming process incorporates air, creating tender cookies.
4. Add Eggs and Vanilla
Beat in eggs one at a time, ensuring each is fully incorporated before adding the next. Mix in vanilla extract and heavy cream. The mixture might look slightly curdled – this is completely normal and will smooth out when you add the flour.
5. Incorporate Flour Mixture
Reduce mixer speed to low and gradually add the flour mixture, mixing just until combined. Overmixing at this stage can lead to tough cookies, so stop as soon as you no longer see streaks of flour.
6. Fold in Cookie Pieces
Using a wooden spoon or sturdy spatula, gently fold in the chopped sandwich cookies and white chocolate chips if using. The key is to distribute them evenly without breaking them down further.
7. Shape and Bake
Using a cookie scoop or tablespoon, drop rounded portions of dough onto your prepared baking sheets, spacing them about 2 inches apart. Bake for 10-12 minutes, until the edges are set but centers still look slightly soft. The cookies will continue cooking on the hot pan after removal.
8. Cool Properly
Let cookies cool on the baking sheet for 5 minutes before transferring to a wire rack. This brief cooling prevents them from breaking apart while ensuring they don’t continue cooking on the hot pan.
Nutritional Information
Each cookie contains approximately 180 calories, with a balanced mix of carbohydrates, fats, and protein. The eggs provide essential amino acids, while the flour offers energy-sustaining carbohydrates. The moderate fat content from butter contributes to the cookies’ satisfying texture and helps with the absorption of fat-soluble vitamins.
Key Nutrients Per Serving:
- Carbohydrates: 24g
- Total Fat: 8g
- Protein: 3g
- Fiber: 1g
- Calcium: 15mg
General Health Benefits:
These homemade treats offer the advantage of controlled ingredients, allowing you to avoid preservatives and artificial additives found in many commercial cookies. The moderate portion size makes them suitable for occasional enjoyment as part of a balanced diet.
Dietary Considerations:
Contains gluten, dairy, and eggs. The natural sugars provide quick energy, making these cookies a suitable post-workout treat when consumed in moderation.
Nutritional values are approximate and may vary based on specific ingredient brands and portion sizes.
Healthier Alternatives for the Recipe
Lower Calorie Modifications:
Replace half the butter with unsweetened applesauce to reduce calories while maintaining moisture. This substitution cuts approximately 40 calories per cookie while adding subtle fruity notes that complement the vanilla beautifully.
Gluten-Free Adaptations:
Use a high-quality gluten-free flour blend that includes xanthan gum. The texture will be nearly identical to the original, though you might notice a slightly more tender crumb. Allow the dough to rest for 10 minutes before baking for optimal results.
Vegan Modifications:
Substitute butter with vegan butter alternatives and replace eggs with flax eggs (1 tablespoon ground flaxseed + 3 tablespoons water per egg, let sit 5 minutes). Choose vegan sandwich cookies for the mix-ins. The flavor remains remarkably similar, with a slightly denser texture.
Reduced Sugar Options:
Replace up to half the sugar with monk fruit sweetener or erythritol. Start with replacing ⅓ of the sugar first to ensure you enjoy the taste. These alternatives may result in slightly less browning but maintain the sweet satisfaction.
Protein Enhancement:
Add 2 tablespoons of vanilla protein powder, reducing the flour by the same amount. This boosts protein content while maintaining structure, making these cookies more satisfying for longer periods.
Serving Suggestions
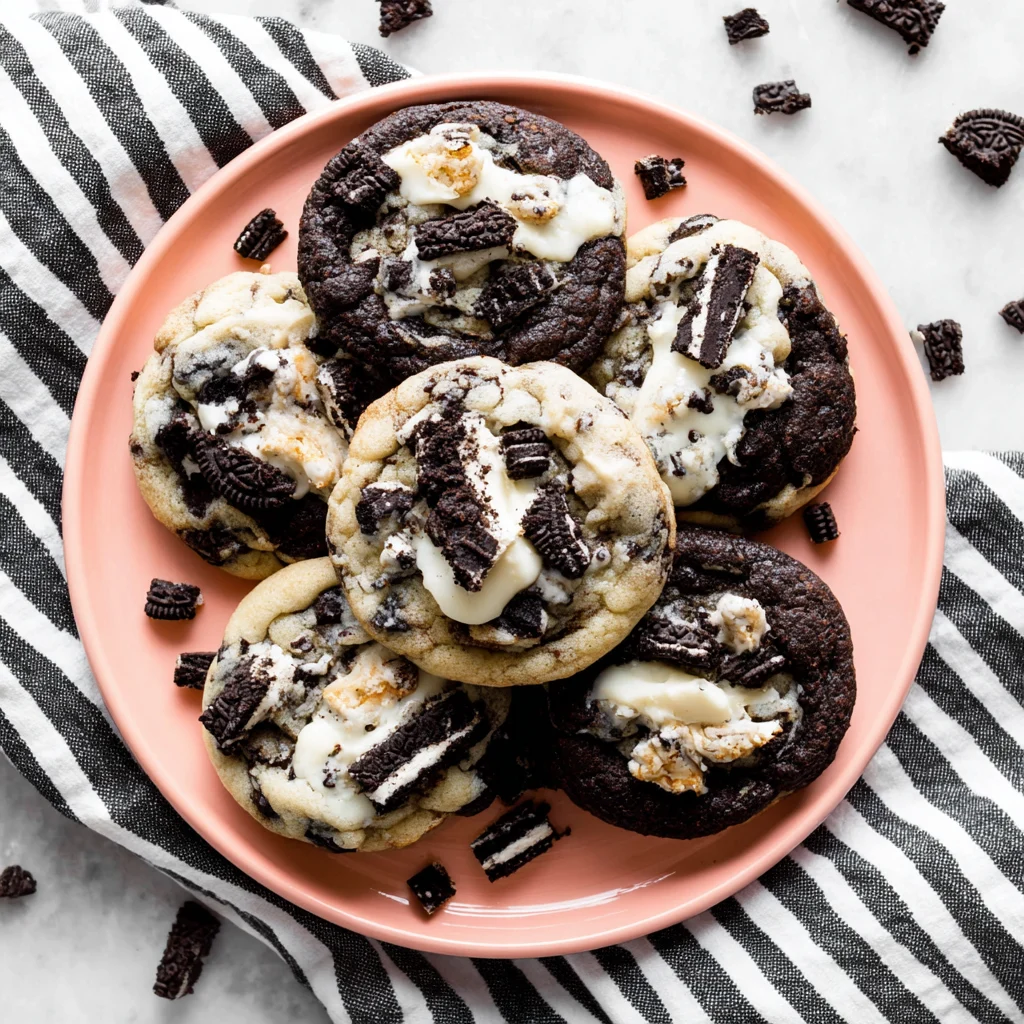
Classic Presentations:
Arrange cookies on a decorative plate with small glasses of cold milk for the ultimate nostalgic experience. For special occasions, stack them in clear glass jars tied with ribbon – they make wonderful homemade gifts that always impress.
Creative Pairings:
These cookies pair beautifully with vanilla ice cream for an indulgent dessert sandwich. Try them alongside hot coffee or chai tea for afternoon treats, or crumble them over yogurt for a delightful breakfast twist.
Seasonal Variations:
During holidays, drizzle melted white chocolate over cooled cookies and add festive sprinkles. For summer gatherings, serve them with fresh berries and whipped cream. The neutral flavor profile makes them adaptable to any season or celebration.
Portion Guidance:
Plan for 2-3 cookies per person for casual snacking, or 1-2 per person when serving as part of a larger dessert spread. The rich flavor means a little goes a long way in terms of satisfaction.
Beverage Recommendations:
Cold milk remains the classic choice, but these cookies also complement hot chocolate, vanilla lattes, or even black tea for adult palates.
Common Mistakes to Avoid
Overbaking Issues:
The most frequent mistake is baking until cookies look completely done. Remove them when centers still appear slightly underbaked – they’ll finish cooking on the pan. Overbaked cookies become hard rather than maintaining that perfect chewy texture.
Temperature Problems:
Using cold ingredients straight from the refrigerator prevents proper creaming and can result in dense cookies. Plan ahead to bring butter and eggs to room temperature, or place eggs in warm water for 10 minutes to speed the process.
Mixing Mishaps:
Overmixing after adding flour develops gluten, creating tough cookies instead of tender ones. Mix just until flour disappears, then stop immediately. Similarly, crushing the cookie pieces too finely eliminates the delightful texture contrast.
Size Inconsistency:
Unevenly sized cookies bake at different rates, leading to some overdone while others remain underbaked. Use a cookie scoop or measuring spoon for consistent portions that bake evenly.
Crowding the Pan:
Placing cookies too close together causes them to merge during baking, creating irregular shapes and uneven cooking. Maintain at least 2 inches between each cookie for proper spread and browning.
Storing Tips for the Recipe
Room Temperature Storage:
Store completely cooled cookies in an airtight container at room temperature for up to one week. Layer them between parchment paper to prevent sticking. Adding a slice of bread to the container helps maintain moisture and keeps cookies soft.
Refrigerator Storage:
For longer freshness, refrigerate cookies in sealed containers for up to two weeks. Bring them to room temperature before serving for optimal texture and flavor. This method works particularly well in humid climates where room temperature storage might cause softening.
Freezer Storage:
Baked cookies freeze beautifully for up to three months when wrapped properly. Place them in freezer-safe containers with parchment paper between layers. Thaw at room temperature for 30 minutes before serving.
Dough Storage:
Unbaked cookie dough can be refrigerated for up to 3 days or frozen for up to 3 months. Wrap tightly in plastic wrap or store in airtight containers. Frozen dough balls can be baked directly from frozen with 1-2 additional minutes of baking time.
Make-Ahead Preparation:
For parties or busy schedules, bake cookies completely and freeze them. They thaw quickly and taste freshly baked when brought to room temperature.
Serving Suggestions
The versatility of these cookies makes them perfect for any occasion, from casual family dinners to elegant dinner parties. When planning your menu, consider browsing through additional options in my complete recipe collection for complementary desserts and treats.
Entertainment Ideas:
Create a cookie decorating station by providing melted chocolate, sprinkles, and small candies for guests to customize their treats. This interactive element adds fun to parties while letting everyone personalize their dessert experience.
Gift Packaging:
Layer cookies in decorative tins with parchment paper between rows. They ship well and make thoughtful homemade gifts for holidays, birthdays, or thank-you gestures. Include a note with storage instructions for the recipients.
Seasonal Adaptations:
Transform these basic cookies for different seasons by adjusting mix-ins. Add crushed peppermint candies for winter holidays, or fold in dried strawberry pieces for spring celebrations. The base remains reliably delicious while accommodating seasonal preferences.
Common Mistakes to Avoid
Ingredient Temperature Troubles:
Room temperature ingredients mix more easily and create better texture. Cold butter won’t cream properly, resulting in dense cookies instead of light, fluffy ones. If you forget to soften butter, cut it into small pieces and let it sit for 15-20 minutes.
Measuring Mistakes:
Scooping flour directly from the container packs it down, leading to dry, crumbly cookies. Instead, fluff the flour with a spoon, then scoop and level for accurate measurements. This simple technique prevents the most common texture issues.
Timing Errors:
Every oven bakes differently, so start checking cookies at 9 minutes even if the instruction says 10-12 minutes. Look for lightly golden edges with centers that still appear slightly underdone – they’ll finish cooking on the hot pan.
Conclusion
These cookies and cream cookies represent everything wonderful about homemade baking – familiar flavors transformed into something special through the care and attention that only comes from your own kitchen. The combination of crispy cookie pieces nestled in soft, vanilla-scented dough creates a texture and flavor experience that store-bought versions simply cannot match.
The beauty of this approach lies not just in the final result, but in the process itself. The aroma filling your kitchen, the satisfaction of creating something delicious with your own hands, and the joy of sharing these treats with people you care about – these elements make the baking experience as rewarding as the eating.
Whether you stick to the classic version or experiment with the healthier alternatives suggested, you’re creating more than just cookies. You’re building memories, showing care for others, and treating yourself to the simple pleasure of homemade goodness.
Try this version exactly as written first, then feel free to make it your own with different mix-ins or modifications. Baking should be joyful and personal, so trust your instincts and have fun with the process. Share your results and variations – I’d love to hear how these cookies become part of your own family traditions.
For more creative baking inspiration and seasonal variations, check out my Pinterest boards where I regularly share new recipe ideas and baking tips.
FAQs
Can I use different types of sandwich cookies for this recipe?
Absolutely! Try golden sandwich cookies for a different flavor profile, or use chocolate peanut butter varieties for a richer taste. Mint-flavored sandwich cookies create a delightful twist that’s perfect for holidays. Just maintain the same quantity regardless of the variety you choose.
Why are my cookies spreading too much during baking?
Excessive spreading usually indicates warm dough or too much butter. Chill your dough for 30 minutes before baking if this occurs. Also check that your butter was properly creamed rather than melted, and ensure your oven is fully preheated before baking.
Can I make these cookies smaller or larger than recommended?
Yes, adjust the baking time accordingly. Smaller cookies need 8-10 minutes, while larger ones may require 13-15 minutes. Watch for the visual cues – lightly golden edges and slightly soft centers – rather than relying solely on timing.
How can I prevent the cookie pieces from sinking to the bottom?
Lightly coat the chopped cookies in flour before folding them into the dough. This helps them stay suspended throughout the cookie rather than settling during baking. Also avoid overmixing once you add the cookie pieces.
What’s the best way to chop the sandwich cookies?
Place cookies in a sealed plastic bag and gently crush with a rolling pin for controlled pieces. Aim for chunks roughly the size of large peas – big enough to provide texture but small enough to distribute evenly throughout the dough.
Can I double this recipe for larger batches?
This recipe doubles beautifully for parties or gift-giving. Use a stand mixer for larger quantities to ensure proper creaming. You may need to mix the cookie pieces in two batches to avoid overloading your mixer and ensure even distribution.