Final Note: Remember to create content that feels natural, authentic, and valuable to readers while following proper SEO practices. Focus on being genuinely helpful rather than just optimizing for search engines.
Introduction
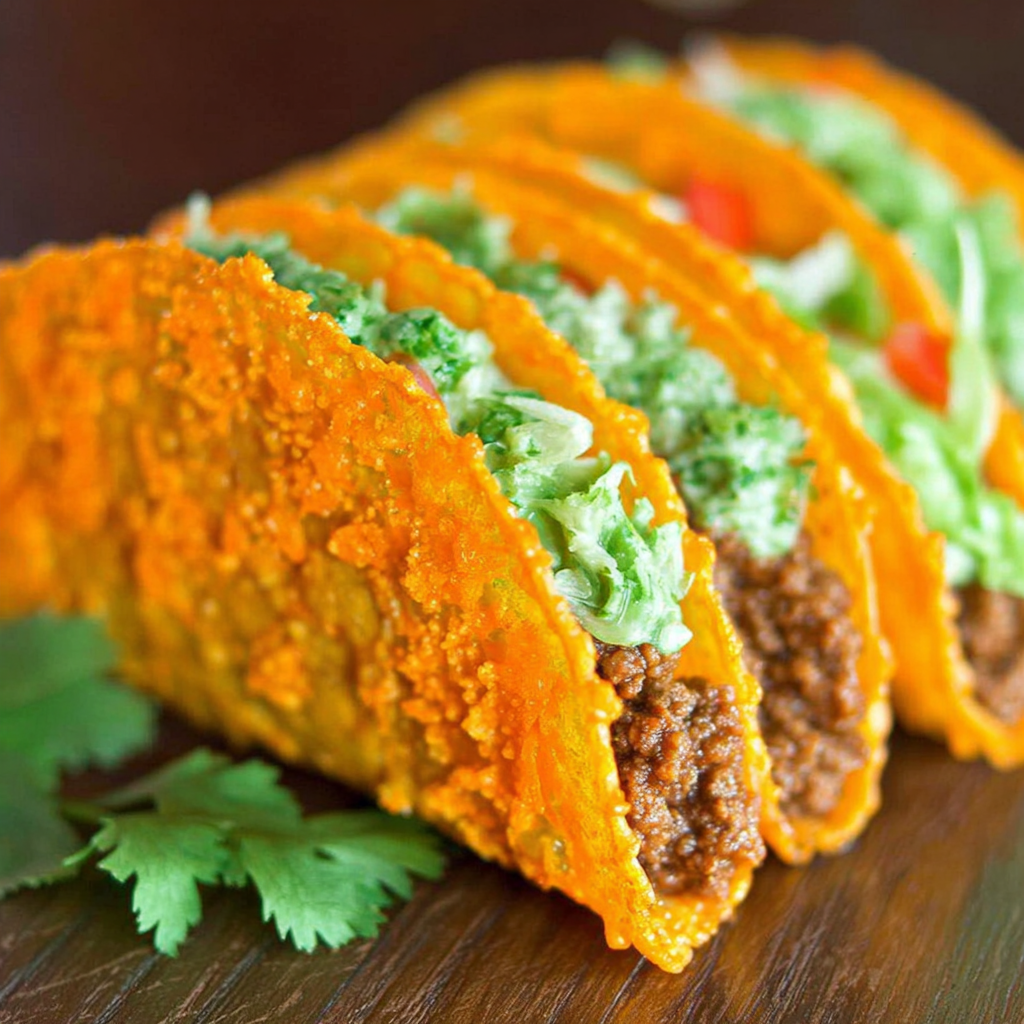
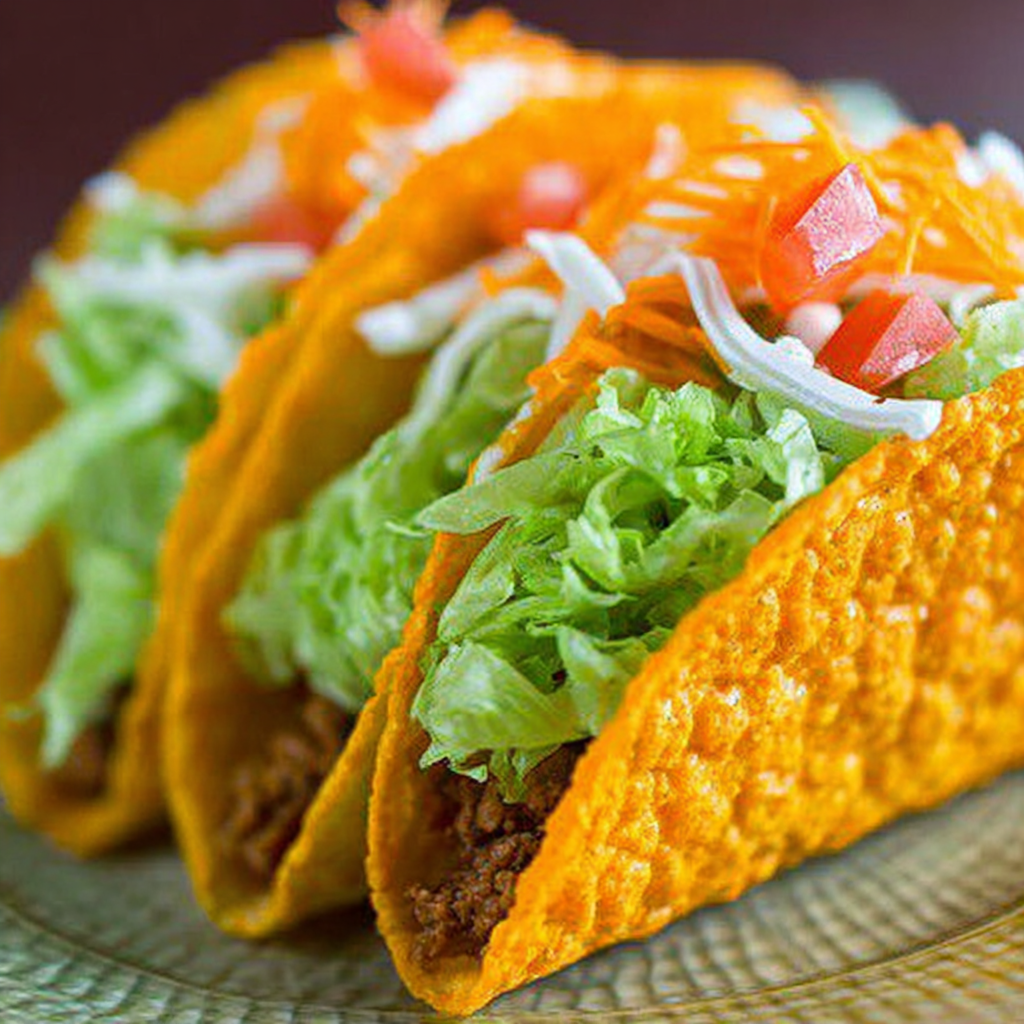
When I first discovered that I could make taco shells entirely from cheese, it felt like stumbling upon a hidden treasure in the kitchen. These Low Carb Cheese Taco Shells completely transformed my taco Tuesday routine, offering all the crispy, crunchy satisfaction of traditional shells without a single grain. The concept is beautifully simple – melted cheese that crisps into golden, flexible shells that hold your favorite fillings perfectly.
What makes these cheese taco shells truly special is their versatility and incredible flavor. Unlike store-bought low-carb alternatives that often taste cardboard-like, these shells bring rich, savory cheese flavor to every bite. They're naturally gluten-free, keto-friendly, and surprisingly sturdy enough to hold generous portions of your favorite taco fillings. The best part? You probably already have everything you need in your refrigerator right now to make these game-changing Low Carb Cheese Taco Shells.
Ingredients List
Base Ingredients:
- 2 cups shredded sharp cheddar cheese (freshly grated works best)
- 1 cup shredded Monterey Jack cheese
- 1/2 cup grated Parmesan cheese
Optional Seasonings:
- 1/2 teaspoon garlic powder
- 1/2 teaspoon onion powder
- 1/4 teaspoon smoked paprika
- 1/4 teaspoon cumin
- Pinch of black pepper
Substitution Suggestions:
For those avoiding dairy, try nutritional yeast mixed with almond flour, though the texture will differ significantly. Mexican cheese blends work wonderfully as a direct substitute. If you prefer milder flavors, swap sharp cheddar for mild cheddar or Colby Jack. For extra richness, add a handful of cream cheese to the mixture.
Timing
Preparation Time: 10 minutes
Cooking Time: 8-10 minutes per batch
Total Time: 25-30 minutes (for 6 shells)
Time Management Tips:
While your first batch bakes, prepare your taco fillings. The shells need about 2 minutes to cool and set after baking, giving you perfect timing to remove them and start the next batch. If making multiple batches, preheat a second baking sheet to speed up the process.
Make-Ahead Suggestions:
These shells can be prepared several hours in advance and stored at room temperature in an airtight container. They maintain their crispness beautifully and actually become easier to handle after cooling completely.
How to Make It
1. Prepare Your Workspace
Preheat your oven to 400°F (200°C) and line a large baking sheet with parchment paper. Have a rolling pin or clean wine bottles ready – you'll use these to shape the shells while they're warm and pliable.
2. Mix the Cheese Blend
In a large bowl, combine all three cheeses along with your chosen seasonings. Mix thoroughly with your hands to ensure even distribution. The different cheese textures will create the perfect balance of meltability and crispness.
3. Form the Shell Bases
Scoop about 1/3 cup of the cheese mixture onto the parchment paper, spacing them at least 4 inches apart. Using your fingers or a spoon, spread each mound into a thin, even circle about 5-6 inches in diameter. Don't worry about perfect circles – rustic edges add character.
4. Bake to Golden Perfection
Slide the baking sheet into the oven and bake for 6-8 minutes, until the edges are golden brown and the centers are bubbly. Watch carefully during the last few minutes – they can go from perfect to overdone quickly.
5. Shape the Shells
This step requires quick but gentle hands. Remove the baking sheet and let the cheese circles cool for exactly 1-2 minutes – they should be set but still warm and flexible. Carefully lift each circle and drape it over a rolling pin or the side of a clean wine bottle to create the taco shell curve. Hold gently in place for about 30 seconds until they hold their shape.
6. Final Cooling
Place the shaped shells on a wire rack to cool completely. They'll continue to crisp up as they cool, developing that satisfying crunch we all love in a good taco shell.
Nutritional Information
Each Low Carb Cheese Taco Shell contains approximately 120-140 calories with virtually zero carbohydrates. They provide excellent protein content from the cheese, typically around 8-10 grams per shell, along with calcium and other essential nutrients naturally found in dairy products.
These shells are naturally keto-friendly, fitting perfectly into low-carb eating plans. They're also an excellent source of healthy fats, which help with satiety and nutrient absorption. The combination of different cheeses provides a complete protein profile while keeping net carbs under 1 gram per shell.
Keep in mind that nutritional values may vary slightly depending on the specific cheese brands used and the exact proportions in your mixture.
Healthier Alternatives for the Recipe
For a lighter version, substitute half the cheese with finely grated zucchini that's been salted and drained for 15 minutes. This reduces calories while adding vegetables to your meal.
Those following a dairy-free diet can experiment with cashew-based cheese alternatives, though the texture and cooking time will need adjustment. Adding a tablespoon of ground flaxseed to any version increases fiber content and adds omega-3 fatty acids.
For reduced sodium options, choose low-sodium cheese varieties and skip additional salt-based seasonings. Fresh herbs like chopped cilantro or oregano can boost flavor without added sodium.
Serving Suggestions
These crispy shells pair beautifully with classic taco fillings – seasoned ground beef, shredded chicken, or black beans for vegetarians. The cheese flavor complements Mexican-inspired seasonings particularly well.
For an elegant presentation, serve them as appetizer cups filled with guacamole, salsa, and a dollop of sour cream. They also work wonderfully for breakfast tacos filled with scrambled eggs and fresh herbs.
Consider serving 2-3 shells per person as they're quite rich. Pair with a fresh green salad dressed with lime vinaigrette to balance the richness of the cheese shells.
Common Mistakes to Avoid
The most frequent mistake is making the cheese circles too thick, which prevents proper crisping and makes shaping difficult. Aim for thin, even layers that will cook uniformly.
Don't let the shells cool too long before shaping – they become brittle and will crack. Conversely, attempting to shape them too soon while they're still very hot can cause burns and tearing.
Overcrowding the baking sheet leads to uneven cooking and makes it difficult to work with the shells quickly. Stick to 3-4 shells per standard baking sheet for best results.
Storing Tips for the Recipe
Store completely cooled shells in an airtight container at room temperature for up to 3 days. Layer them between parchment paper to prevent sticking and breaking.
For longer storage, freeze the shells in rigid containers for up to 1 month. Thaw at room temperature for 15-20 minutes before using – they'll regain their crispness naturally.
If shells lose their crispness, refresh them in a 350°F oven for 2-3 minutes. This works especially well for day-old shells.
Avoid refrigerating these shells as the moisture can make them soggy and difficult to restore to their original texture.
Conclusion
These Low Carb Cheese Taco Shells prove that eating low-carb doesn't mean sacrificing the foods you love. They deliver all the satisfaction of traditional tacos while fitting perfectly into your healthy eating goals. The technique is simple enough for weeknight dinners yet impressive enough for entertaining guests.
I encourage you to experiment with different cheese combinations and seasonings to create your signature version. Start with this basic recipe, then let your creativity guide you toward your perfect taco shell. Give them a try tonight – I'm confident they'll become a regular feature in your meal rotation.
FAQs
Can I make these shells ahead of time for a party?
Absolutely! Make them up to 24 hours in advance and store in airtight containers. They actually become easier to handle and maintain their crispness beautifully when made ahead.
What's the best way to reheat leftover shells?
Place them on a baking sheet and warm in a 300°F oven for 2-3 minutes. This restores their crispness without overcooking. Avoid microwaving as it makes them soggy.
Can I use pre-shredded cheese from the bag?
While convenient, freshly grated cheese melts more evenly and creates better texture. Pre-shredded cheese contains anti-caking agents that can affect the final result, but it will work in a pinch.
Why do my shells crack when I try to shape them?
This usually means they've cooled too much before shaping. They need to be shaped while still warm and pliable, about 1-2 minutes after removing from the oven.
How do I prevent the shells from being too greasy?
Use a combination of cheeses with different fat contents, and make sure they're spread thin enough to cook properly. Briefly blotting them with paper towels immediately after baking can help remove excess oil.
Can I make mini shells for appetizers?
Yes! Use about 2 tablespoons of cheese mixture per shell and reduce baking time to 4-5 minutes. Shape them over the handle of a wooden spoon for perfect bite-sized cups.