Introduction
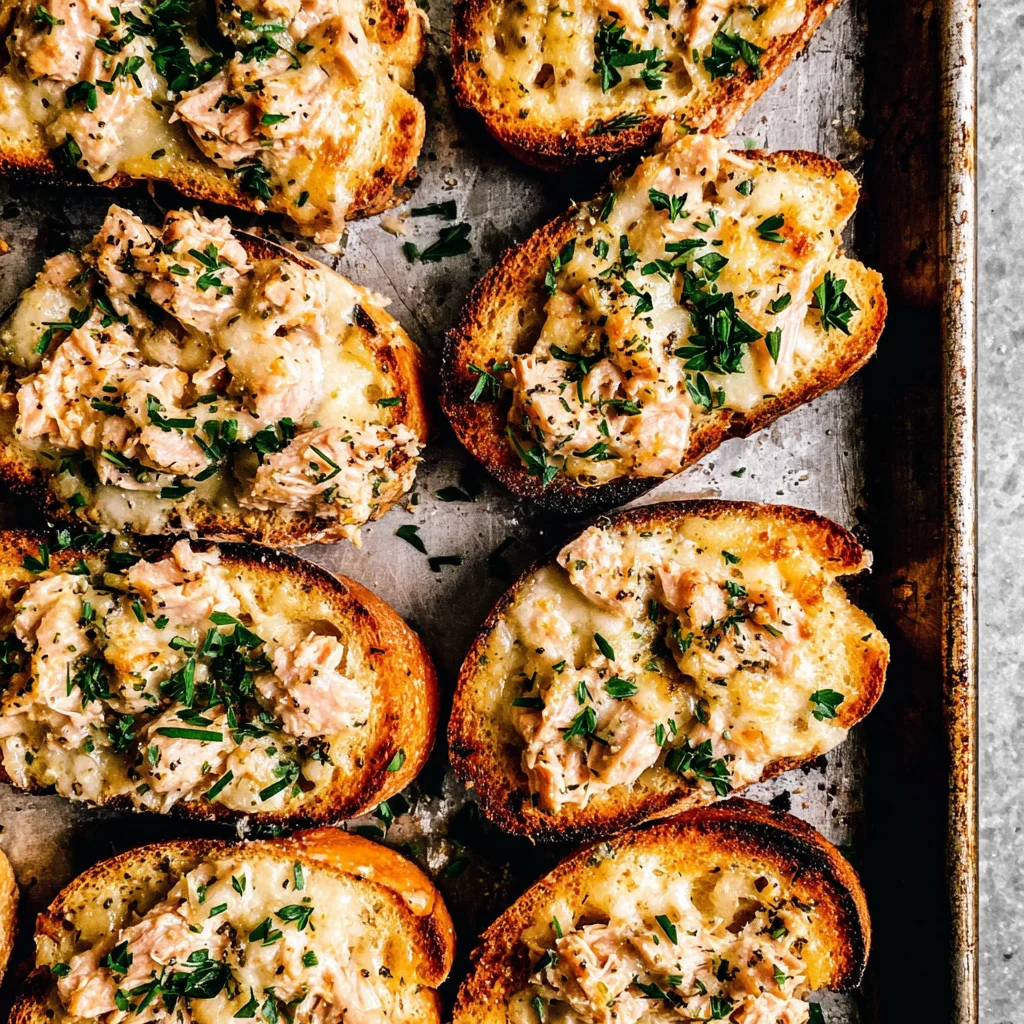
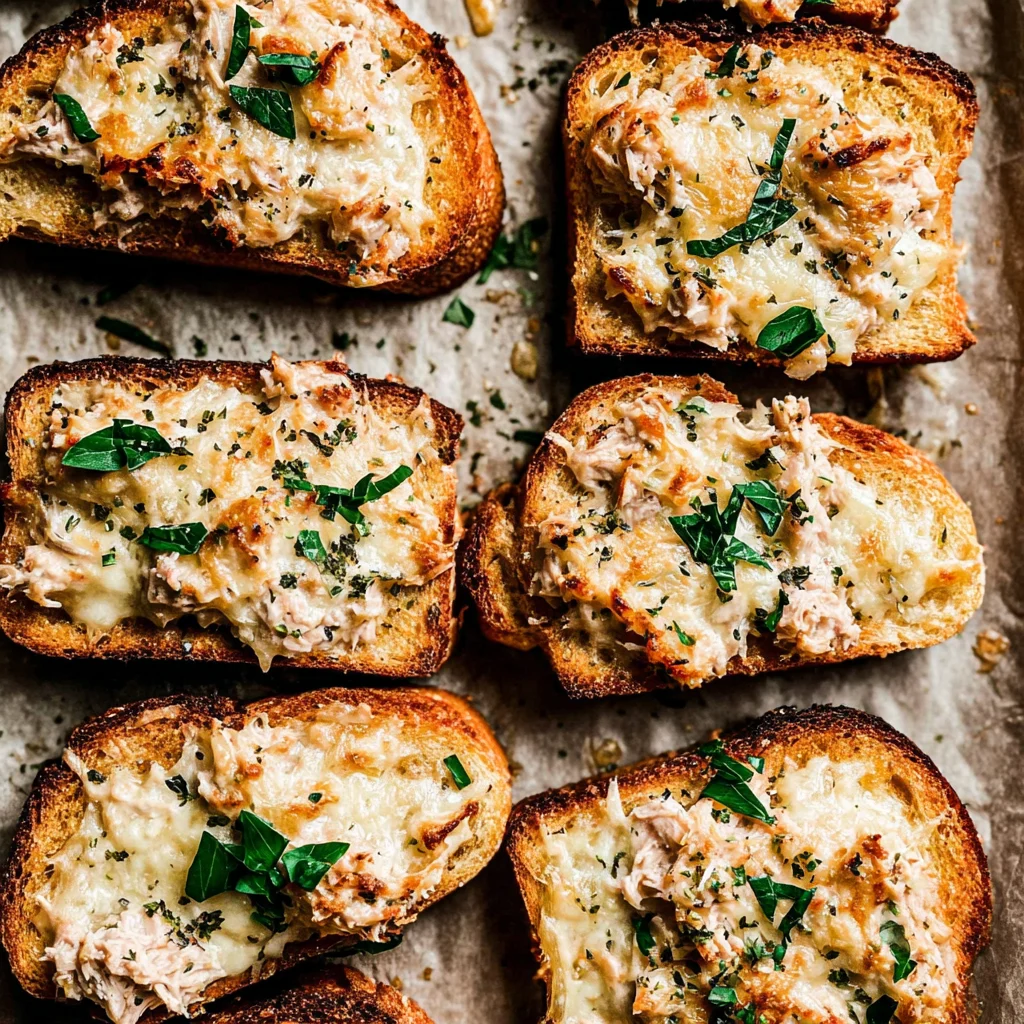
There's something magical about transforming a humble can of tuna into a restaurant-quality meal that feeds the whole family. Sheet Pan Tuna Melts take the beloved diner classic and elevate it to new heights of convenience and flavor. Picture this: golden-brown bread topped with creamy, perfectly seasoned tuna salad and bubbling, melted cheese, all prepared on one simple pan.
This ingenious approach to tuna melts revolutionizes weeknight dinners by eliminating the hassle of individual sandwich assembly and stovetop flipping. Instead of standing over a hot skillet, you simply arrange everything on a sheet pan and let the oven work its magic. The result? Perfectly crispy bottoms, gooey cheese tops, and that irresistible contrast of textures that makes tuna melts so addictive.
What makes these sheet pan tuna melts truly special is their versatility and crowd-pleasing nature. Whether you're feeding hungry teenagers after school, hosting a casual lunch gathering, or simply craving comfort food without the fuss, this recipe delivers satisfaction every single time.
Ingredients List
For the Tuna Mixture:
- 4 cans (5 oz each) solid white albacore tuna in water, drained
- 1/2 cup mayonnaise (or Greek yogurt for lighter option)
- 2 celery stalks, finely diced
- 1/4 red onion, minced
- 2 tablespoons fresh lemon juice
- 1 tablespoon Dijon mustard
- 2 tablespoons fresh dill, chopped
- Salt and freshly ground black pepper to taste
For Assembly:
- 8 thick slices sourdough or whole grain bread
- 2 cups sharp cheddar cheese, shredded
- 1 large tomato, sliced into 8 rounds
- 2 tablespoons butter, melted
- Fresh parsley for garnish
Substitution Suggestions:
- Gluten-free: Use your favorite gluten-free bread
- Dairy-free: Substitute with plant-based cheese alternatives
- Lower fat: Replace mayonnaise with Greek yogurt or avocado
- Flavor variations: Try Swiss cheese, add sliced pickles, or incorporate capers for extra tang
Timing
Total Time: 25 minutes
- Prep Time: 15 minutes
- Baking Time: 10 minutes
This recipe shines in its efficiency. While your oven preheats, you'll have plenty of time to mix the tuna salad and prep your ingredients. The beauty of sheet pan cooking means no monitoring multiple pans or timing individual melts. Once assembled, the oven does all the work while you prepare a simple side salad or set the table.
Make-Ahead Tips: The tuna mixture can be prepared up to 24 hours in advance and stored in the refrigerator. For best results, assemble the melts just before baking to prevent soggy bread.
How to Make It
1. Prepare Your Workspace
Preheat your oven to 425°F (220°C) and line a large sheet pan with parchment paper. This prevents sticking and makes cleanup effortless. Position your oven rack in the upper third for optimal browning.
2. Create the Perfect Tuna Mixture
In a large mixing bowl, combine the drained tuna, mayonnaise, diced celery, minced red onion, lemon juice, and Dijon mustard. Gently fold together, being careful not to overmix—you want some texture remaining. Fold in the fresh dill and season generously with salt and pepper. Taste and adjust seasoning as needed.
3. Prepare the Bread Base
Arrange the bread slices on your prepared sheet pan, leaving space between each piece. Lightly brush the tops with melted butter for extra golden color and flavor. This step ensures the bread develops a beautiful crust while preventing sogginess.
4. Assemble with Care
Divide the tuna mixture evenly among the bread slices, spreading it to the edges. Top each portion with a tomato slice, then generously sprinkle the shredded cheese over everything. The cheese should cover the tuna completely for the best melting results.
5. Bake to Golden Perfection
Slide the sheet pan into your preheated oven and bake for 8-10 minutes, until the cheese is bubbly and golden brown. Keep an eye on them during the last few minutes to prevent over-browning. The edges should be crispy while the centers remain creamy.
6. Finish and Serve
Remove from the oven and let cool for 2-3 minutes. Garnish with fresh parsley and serve immediately while the cheese is still gloriously melty.
Nutritional Information
Each serving of these sheet pan tuna melts provides approximately:
- Calories: 380-420 per serving
- Protein: 28-32 grams
- Carbohydrates: 25-30 grams
- Fat: 18-22 grams
Key Nutritional Benefits:
- High-quality protein from tuna supports muscle maintenance and satiety
- Omega-3 fatty acids promote heart and brain health
- Calcium from cheese contributes to bone health
- B vitamins from tuna support energy metabolism
Nutritional values are approximate and may vary based on specific ingredients and portion sizes used.
Healthier Alternatives for the Recipe
Lower Calorie Options:
- Replace mayonnaise with plain Greek yogurt mixed with a touch of olive oil
- Use reduced-fat cheese or decrease cheese quantity by half
- Opt for whole grain bread for added fiber
Gluten-Free Adaptations:
- Choose certified gluten-free bread or use portobello mushroom caps as the base
- Verify that all condiments and seasonings are gluten-free
Lighter Versions:
- Use tuna packed in water instead of oil
- Add more vegetables like diced bell peppers or cucumber for volume without calories
- Try avocado slices instead of cheese for healthy fats
Plant-Based Alternative:
- Substitute chickpea salad (mashed chickpeas with similar seasonings) for tuna
- Use nutritional yeast or vegan cheese alternatives
Serving Suggestions
These sheet pan tuna melts pair beautifully with:
- Fresh Sides: Crisp garden salad with vinaigrette, coleslaw, or sliced fresh fruit
- Warm Options: Tomato soup, vegetable soup, or sweet potato fries
- Beverages: Iced tea, lemonade, or a crisp white wine for adults
Presentation Ideas:
- Cut diagonally for an elegant lunch presentation
- Serve with pickle spears and kettle chips for a classic deli experience
- Add a side of fresh herbs or microgreens for color contrast
Portion Guidance:
- One melt serves as a light lunch
- Two melts make a hearty dinner portion
- Cut into smaller pieces for appetizer portions
Common Mistakes to Avoid
Soggy Bread Issues:
Drain tuna thoroughly and avoid over-saucing the mixture. Pat tomato slices dry before placing them on the melts.
Uneven Melting:
Shred cheese yourself rather than using pre-shredded varieties, which contain anti-caking agents that prevent smooth melting.
Overcooking Problems:
Watch carefully during the last few minutes of baking. Cheese can go from perfectly melted to burnt quickly.
Assembly Errors:
Don't overload with tuna mixture—less is more for proper heating and eating ease.
Temperature Mistakes:
Ensure your oven is fully preheated before baking for consistent results.
Storing Tips for the Recipe
Refrigerator Storage:
- Prepared tuna mixture: Store covered for up to 3 days
- Baked melts: Refrigerate for up to 2 days in airtight containers
- Best quality is maintained when stored separately from any fresh garnishes
Reheating Instructions:
- Oven method: Reheat at 350°F for 5-7 minutes until warmed through
- Avoid microwaving as it can make bread soggy
- For crispier results, use a toaster oven
Make-Ahead Preparation:
- Prepare tuna mixture up to 24 hours ahead
- Assemble on parchment-lined pans, cover with plastic wrap, and refrigerate for up to 4 hours before baking
- Add 2-3 minutes to baking time if cooking from cold
Conclusion
Sheet pan tuna melts represent the perfect marriage of convenience and comfort food satisfaction. This recipe transforms a simple weeknight dinner into something special without requiring advanced cooking skills or exotic ingredients. The beauty lies in its simplicity—quality ingredients, smart technique, and the magic of sheet pan cooking.
The versatility of these melts means they'll become a regular rotation in your meal planning, adapting easily to whatever ingredients you have on hand or dietary preferences you need to accommodate. From busy Tuesday nights to lazy weekend lunches, this recipe delivers consistent, delicious results that please both kids and adults alike.
Give these sheet pan tuna melts a try and discover how something so simple can taste so extraordinary. Don't forget to share your favorite variations or creative additions—cooking is always better when we learn from each other!
FAQs
Q: Can I make these melts ahead of time and freeze them?
A: It's best to freeze the prepared tuna mixture separately rather than assembled melts. Bread doesn't freeze and reheat well once topped. Thaw the tuna mixture overnight and assemble fresh for best results.
Q: What type of bread works best for sheet pan tuna melts?
A: Thick-sliced sourdough, whole grain, or artisan breads work wonderfully. Avoid thin sandwich bread which can become soggy. Day-old bread actually works better as it's less likely to get mushy.
Q: Can I use fresh tuna instead of canned?
A: Absolutely! Grill or sear fresh tuna, let it cool, then flake it into chunks. You'll need about 1.5 pounds of fresh tuna to replace four cans.
Q: Why is my cheese not melting evenly?
A: Pre-shredded cheese contains anti-caking agents that prevent smooth melting. Grate your own cheese from a block for better results, and make sure your oven is fully preheated.
Q: How do I prevent the bread from getting soggy?
A: Drain tuna very well, pat tomato slices dry, and don't over-sauce the mixture. Brushing bread lightly with melted butter also creates a barrier.
Q: Can I add other vegetables to the tuna mixture?
A: Definitely! Diced bell peppers, shredded carrots, chopped pickles, or even sliced olives make excellent additions. Just be mindful not to add too much moisture.