Introduction
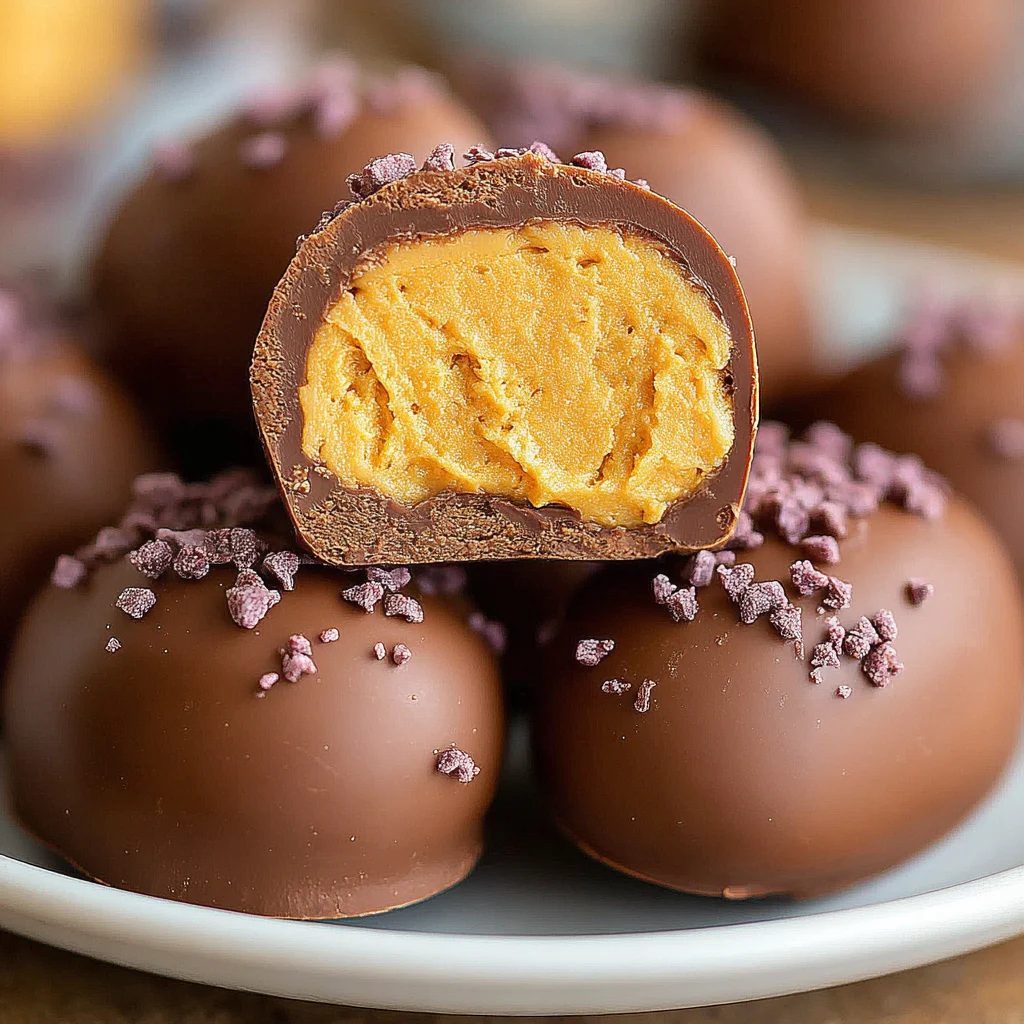
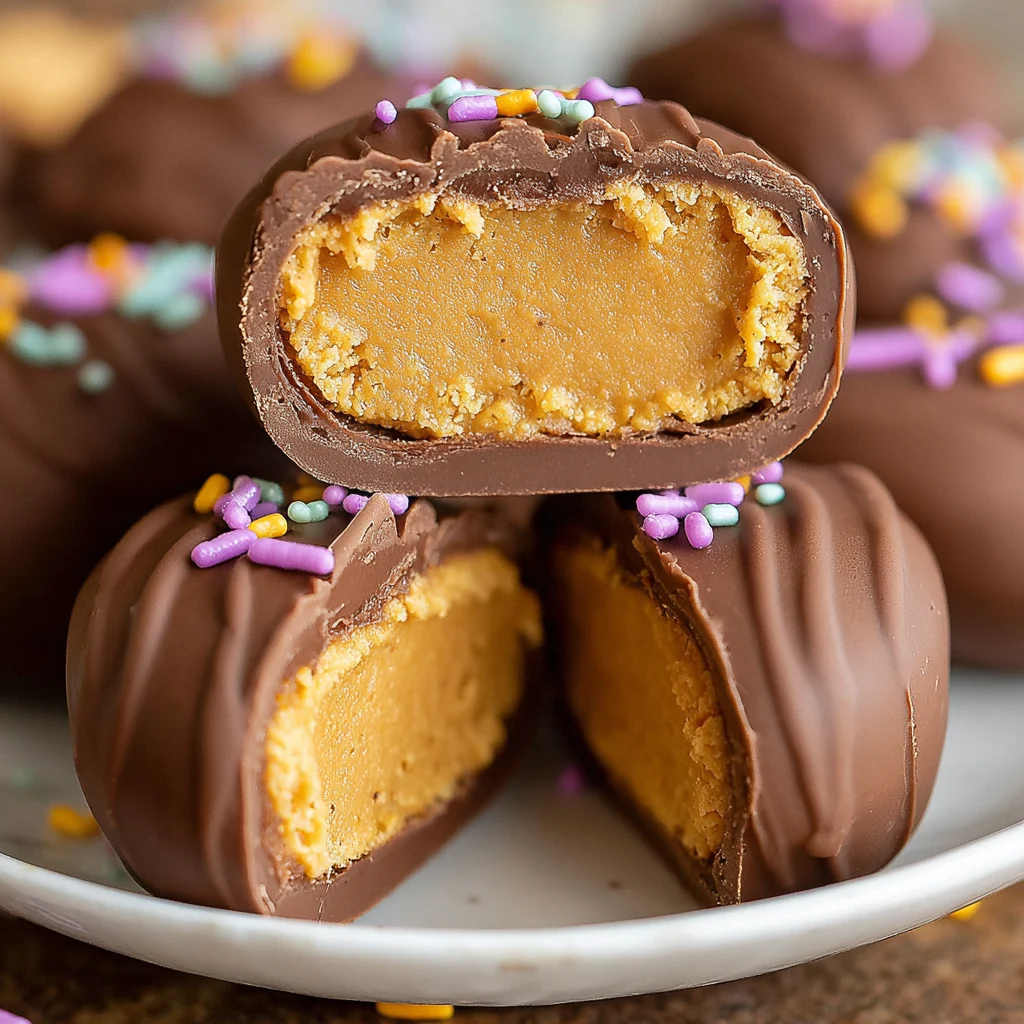
There’s something magical about biting into a perfectly creamy, homemade chocolate peanut butter egg that store-bought versions simply can’t match. These chocolate peanut butter eggs combine rich, velvety peanut butter filling with a smooth chocolate shell, creating the ultimate spring treat that rivals any commercial candy. The best part? They’re surprisingly simple to make at home with just a handful of pantry staples, and you can customize the sweetness and chocolate coating to your heart’s content.
Ingredients List
For the Peanut Butter Filling:
- 1 cup creamy peanut butter
- 4 tablespoons butter, softened
- 2 cups powdered sugar
- 1 teaspoon vanilla extract
- 1/4 teaspoon salt
For the Chocolate Coating:
- 12 oz semi-sweet chocolate chips (or chopped chocolate)
- 2 tablespoons coconut oil or vegetable shortening
Substitutions:
- Use natural peanut butter, but add an extra tablespoon of powdered sugar for binding
- Swap coconut oil with butter for a richer chocolate coating
- Try dark chocolate or milk chocolate chips based on your preference
Timing
Prep Time: 30 minutes
Chill Time: 2 hours
Total Time: 2 hours 30 minutes
Make-ahead tip: Shape the peanut butter eggs up to 3 days in advance and store them covered in the refrigerator before dipping in chocolate.
How to Make It
1. Prepare the Peanut Butter Filling
Mix the peanut butter and softened butter in a large bowl until completely smooth and creamy. Gradually add the powdered sugar, vanilla, and salt, stirring until the mixture forms a thick, moldable dough. You’ll know it’s ready when the filling holds together without being sticky and has a play-dough-like consistency. This step is crucial because properly mixed filling prevents cracking during the chocolate dipping process.
2. Shape the Eggs
Scoop about 2 tablespoons of filling and roll it into a ball between your palms. Gently shape each ball into an egg by rolling it slightly more on one end to create the classic tapered egg shape. Place the shaped eggs on a parchment-lined baking sheet, ensuring they don’t touch each other. The warmth from your hands helps create smooth, even shapes, so work quickly but don’t rush this step.
3. Chill the Shaped Eggs
Refrigerate the peanut butter eggs for at least 2 hours or until they’re firm to the touch. This chilling time is essential because cold eggs hold their shape better when dipped in warm chocolate and create that satisfying snap when you bite into the finished treat. You’ll notice they feel solid and won’t dent when gently pressed.
4. Melt the Chocolate Coating
Combine chocolate chips and coconut oil in a microwave-safe bowl. Microwave in 30-second intervals, stirring between each heating, until the mixture is completely smooth and glossy. The coconut oil creates a thinner coating that hardens beautifully, giving your homemade peanut butter eggs that professional candy shop appearance and texture.
5. Dip and Set the Eggs
Working with one egg at a time, use a fork or dipping tool to lower each chilled egg into the melted chocolate, ensuring complete coverage. Gently tap the fork against the bowl’s edge to remove excess chocolate, then place the coated egg back on the parchment-lined sheet. You’ll hear a slight sizzle as the cold egg meets the warm chocolate – this helps create an even coating that sets quickly.
6. Final Chill and Finish
Refrigerate the chocolate-coated eggs for 15-20 minutes until the coating is completely set and has a matte finish. For a professional touch, use a small spoon to drizzle contrasting chocolate on top or gently press chopped nuts into the coating before it sets completely.
Nutritional Information
Each chocolate peanut butter egg contains approximately 180 calories, 4g protein, 18g carbohydrates, and 12g fat. These treats provide healthy fats from peanut butter and a satisfying protein boost, making them more nutritious than many commercial candies. Values are approximate and may vary based on specific ingredients used.
Serving Suggestions
Arrange these homemade peanut butter eggs on a decorative platter alongside fresh berries and nuts for an elegant dessert spread. They pair beautifully with coffee, milk, or even a glass of dessert wine. Plan for 2-3 eggs per person, as their rich flavor makes them perfectly satisfying in smaller portions.
Common Mistakes to Avoid
Under-chilling the filling: Soft eggs will lose their shape when dipped, creating messy, uneven coatings. Always ensure they’re firm before dipping. Overheating chocolate: This causes seizing and grainy texture. Use gentle heat and stir frequently. Skipping the coconut oil: Without it, the chocolate coating will be too thick and may crack. Working in a warm kitchen: Heat makes the filling soft and difficult to handle – work in a cool environment when possible.
Storing Tips
Store finished chocolate peanut butter eggs in an airtight container in the refrigerator for up to 2 weeks. Layer them between parchment paper to prevent sticking. For longer storage, freeze for up to 3 months. Let them come to room temperature for 10-15 minutes before serving for the best texture and flavor.
Conclusion
These homemade chocolate peanut butter eggs prove that the most beloved treats are often the simplest to create. With their perfectly balanced sweet and salty flavors and irresistible creamy texture, they’ll become your go-to recipe for special occasions and everyday indulgences. Give them a try and discover how rewarding homemade candy-making can be!
FAQs
Can I use natural peanut butter instead of regular?
Yes, but add an extra tablespoon of powdered sugar since natural peanut butter has more oil and less binding agents, which can make the filling softer.
Why is my chocolate coating too thick?
This usually means the chocolate is too cool or you haven’t added enough coconut oil. Gently reheat and add a bit more oil for smoother dipping consistency.
How do I prevent the eggs from cracking during dipping?
Ensure your peanut butter eggs are properly chilled and your chocolate isn’t too hot. The temperature contrast should be gradual, not extreme.
Can I make these without coconut oil?
Absolutely! Use vegetable shortening or even butter, though butter may create a softer coating that takes longer to set completely.
What’s the best way to get smooth egg shapes?
Work with slightly warm hands and roll gently. If the filling becomes too soft, chill your hands in cold water and dry them before continuing.
For more delicious homemade treats, check out our complete recipe collection on Pinterest!
Chocolate Peanut Butter Eggs
Ingredients
Method
- Mix the peanut butter and softened butter in a large bowl until completely smooth and creamy. Gradually add the powdered sugar, vanilla, and salt, stirring until the mixture forms a thick, moldable dough with play-dough-like consistency.
- Scoop about 2 tablespoons of filling and roll it into a ball between your palms. Gently shape each ball into an egg by rolling it slightly more on one end to create the classic tapered egg shape. Place on parchment-lined baking sheet.
- Refrigerate the peanut butter eggs for at least 2 hours or until they’re firm to the touch and won’t dent when gently pressed.
- Combine chocolate chips and coconut oil in a microwave-safe bowl. Microwave in 30-second intervals, stirring between each heating, until the mixture is completely smooth and glossy.
- Working with one egg at a time, use a fork or dipping tool to lower each chilled egg into the melted chocolate, ensuring complete coverage. Gently tap the fork against the bowl’s edge to remove excess chocolate, then place back on parchment-lined sheet.
- Refrigerate the chocolate-coated eggs for 15-20 minutes until the coating is completely set and has a matte finish.